
This post is for the nerdy nerdy farm-nerds out there!
I have spent many winter hours milking the internet for good ideas for how to improve small-scale food production, and it’s been a great help to me here on the farm… and so here I go telling a little story of my own.
The project: building and growing in mobile high tunnels. Spring of 2020.
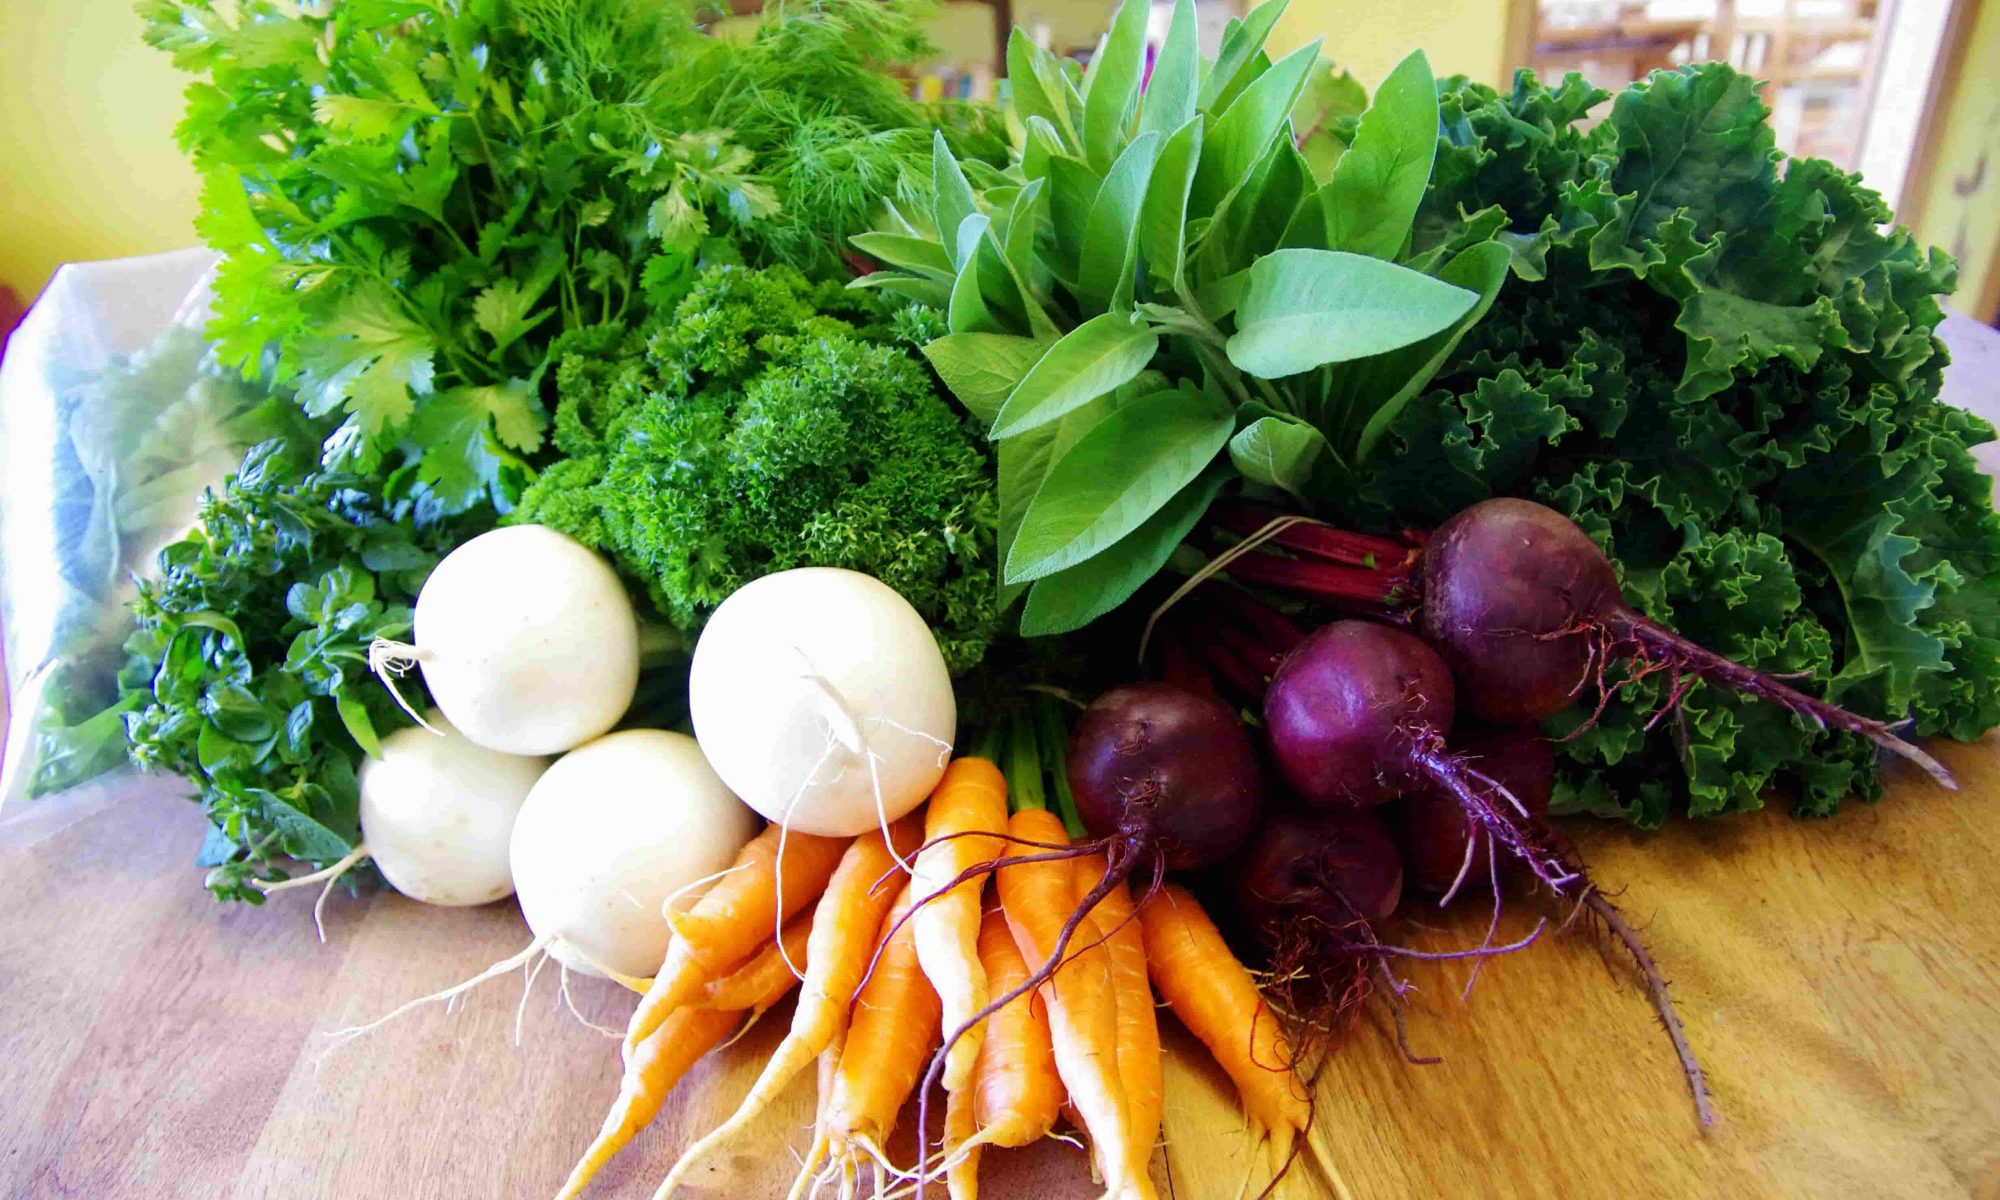
The goal was to extend the garden season; to bring a wider variety of produce to market (here in “the hoof” it’s nearly impossible to grow tomatoes and peppers in the field… we just don’t have that much heat and not enough frost free days) and to bring produce to the market sooner in the summer and have fresh greens later into the fall.
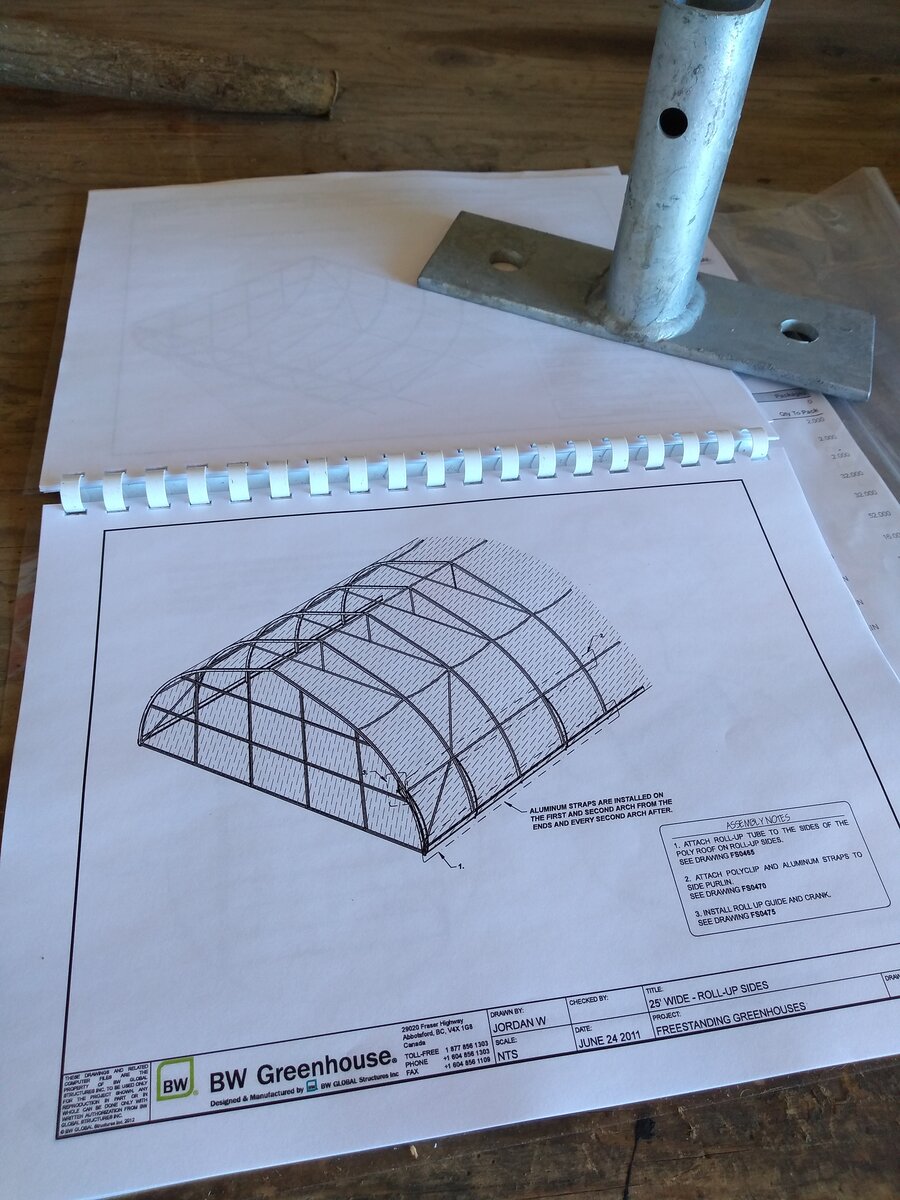
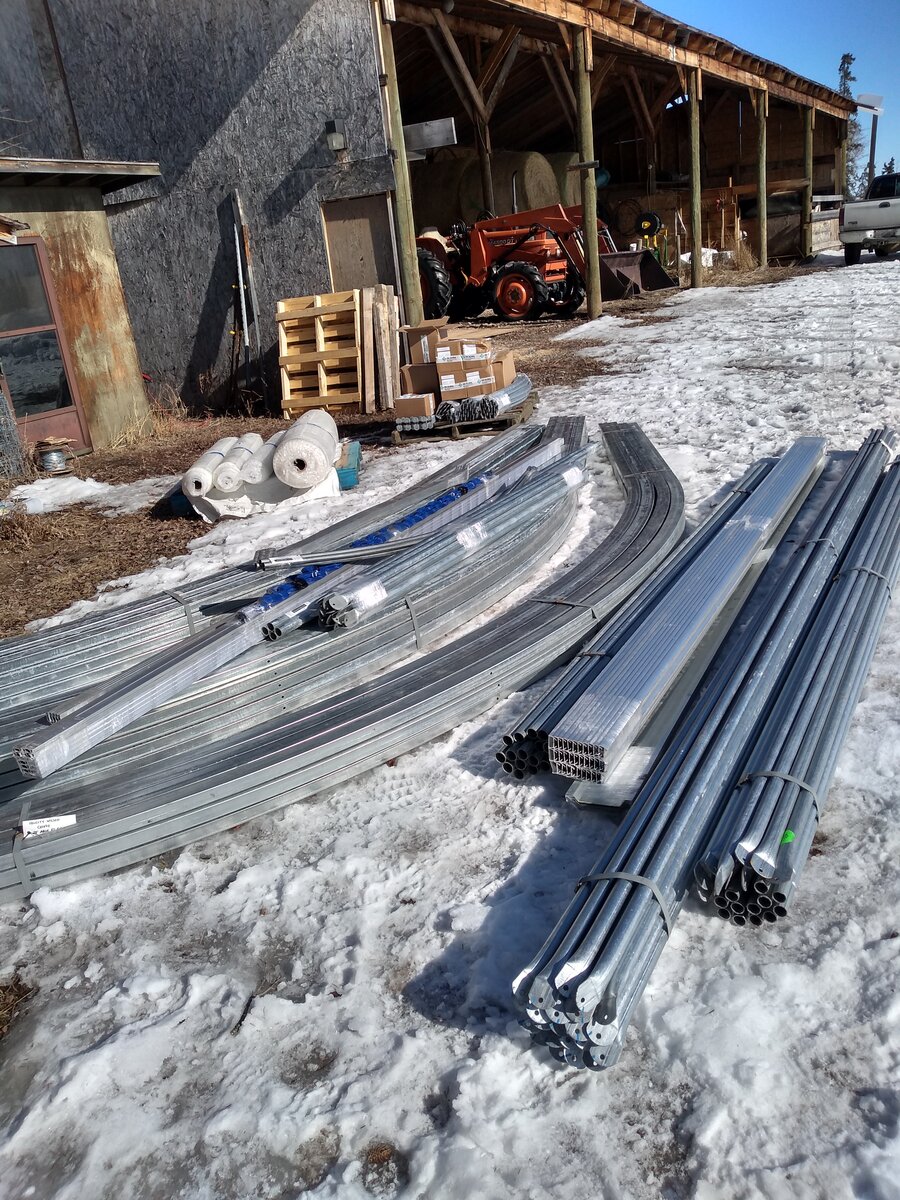
I decided to build two of them (what the heck – I was paying to ship the materials here anyways) and decided to go with 30′ wide x 48′ long. BW Global was the company I dealt with, and I’d recommend them – not the cheapest option out there, but I don’t enjoy repairing things, so I was happy to pay a bit more to get something sturdy.
Two 48′ long tunnels made more sense to me rather than one 96′ long one because my garden is not completely flat, and I didn’t want to be putting too much strain on the structures trying to make them sit and then move on such a long stretch of not-level ground. Also my tractor is not all that large, and the plan was to drag the tunnels with the tractor.
Because we get a fair bit of snow here, I chose the “gothic arch” design, which is better at shedding snow than the traditional half-circle arch shape. Hoops are at 4′ spacing and I paid a bit extra to have extra crossbracing included. I also chose to go with the roll-up side option. These high tunnel structures are NOT designed to be mobile, so I knew that the warranty would be invalid if I set them up the way I wanted to… so if the houses collapsed under snow or flew away, or warped beyond recognition in a windstorm, it’d be my loss completely. This was good motivation to make sure they were stout and well archored.
Typically, when these high tunnels are set up, they’re built on top of a proper concrete foundation and anchored down like any traditional structure. What I wanted to do was to build them on large skis, which would be anchored to the ground with a combination of rebar Tpins and earth screws. I’d seen designs where people used lumber for the skis, and some which were a combination of wood and metal, but I figured that wood rots a lot faster than iron, especially in a moist environment like a greenhouse, and… I don’t enjoy repairing things. So I chose the completely metal option. I bought 20′ and 10′ lengths of channel iron from the local machine shop, and measured out where the base brackets for the hoops should go (every 4′) and where my anchoring pins should go (also every 4′, between each hoop… did I mention I was worried about these things flying away?) So I welded the base brackets onto the channel iron, and drilled holes for the anchor pins, and then welded the pieces together into 50′ long skis in the yard here. I also made the ends have 8″ upturned ski ends, because… well, theyr’e skis!
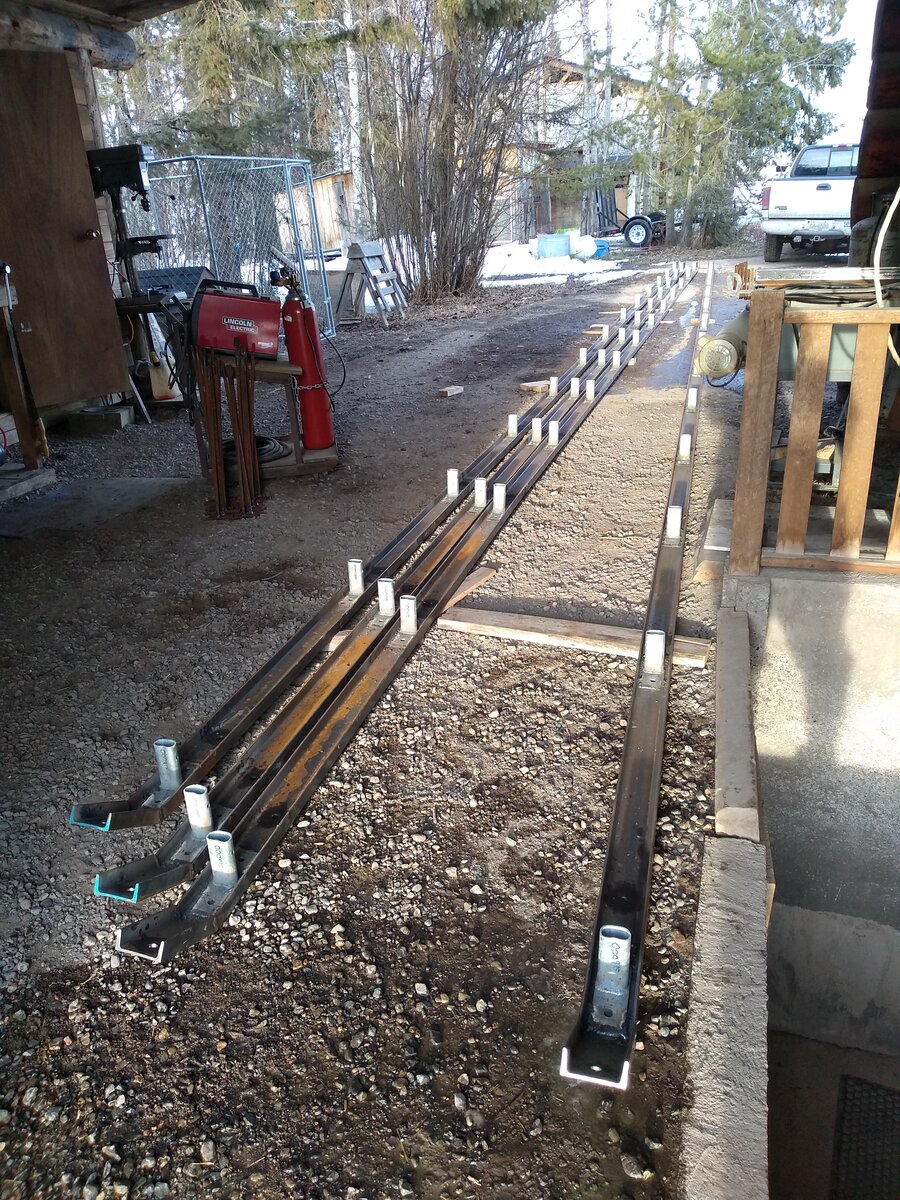
… As a side note, this is when I realized that the base brackets – like the rest of the high tunnel materials – had a galvanized coating on them, and that when you weld galvanized material it gives off toxic fumes… so I used my angle grinder to grind off the coating on the bits of the brackets where I’d be welding them to the channel iron. This was tedious and I think there may have been a better way to do it… but… that’s what I did! (And I didn’t die of fume poisoning and I’m pretty happy about that.)
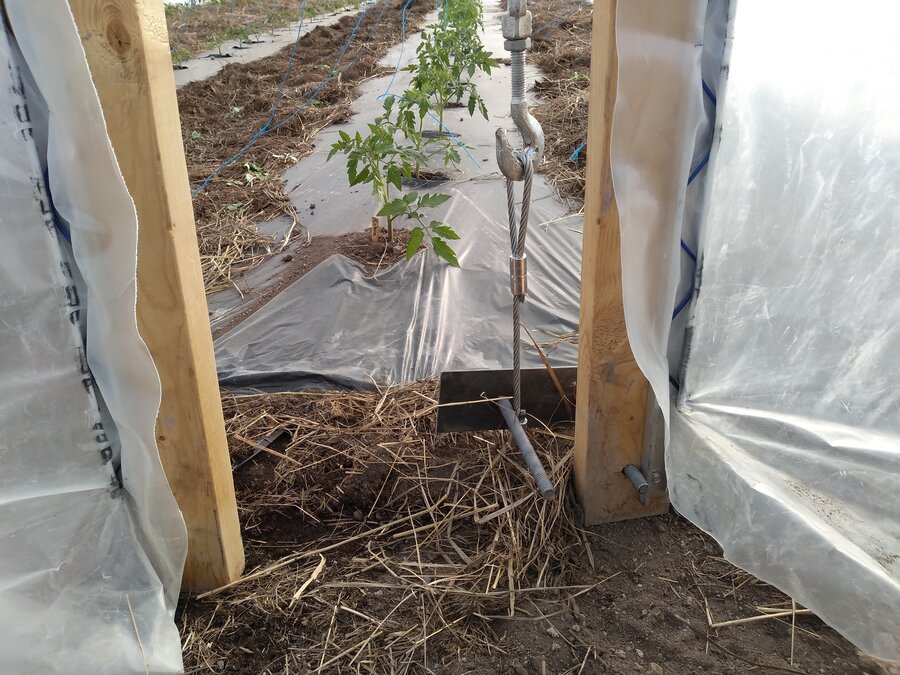
Building time! I moved the skis into place in the garden where I wanted to set up the tunnels, measured the diagonals, and pinned the skis into place with a 4 Tpins. Then set the hoops up, then put all the Tins in; I tried to pound them in at slightly different angles, and to also make sure that once the plastic skin was on, I’d still be able to pull the pins out without having to pull them through any plastic. The rebar anchor Tpins are 36″ long. I have no idea if this is overkill or not.
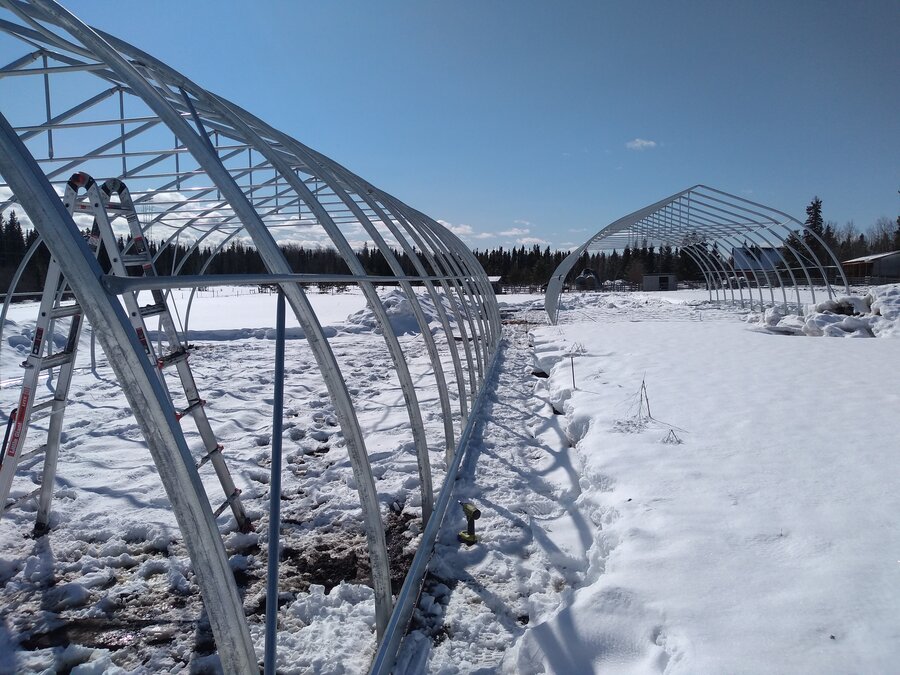
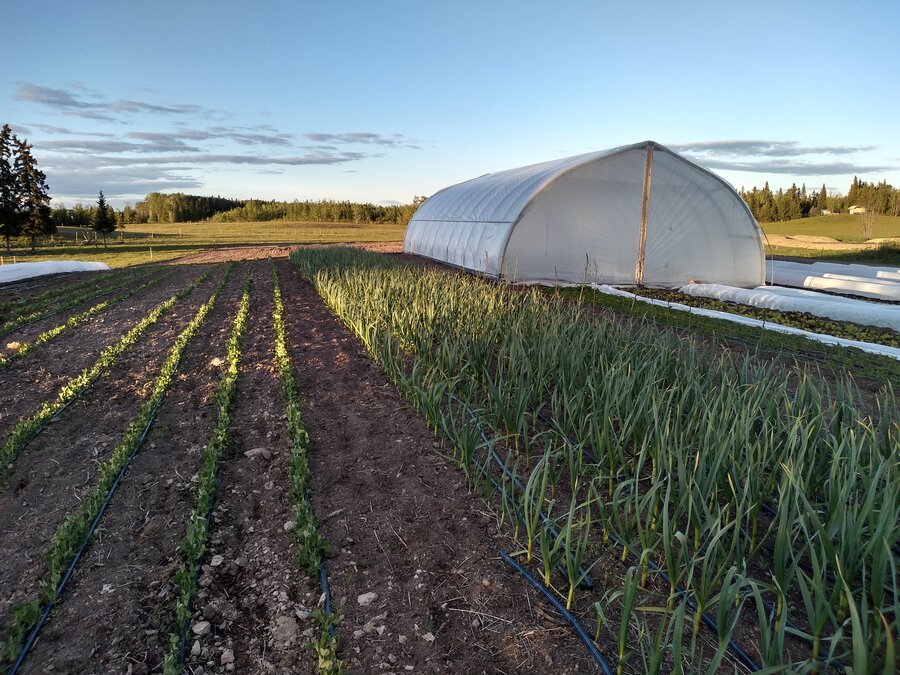
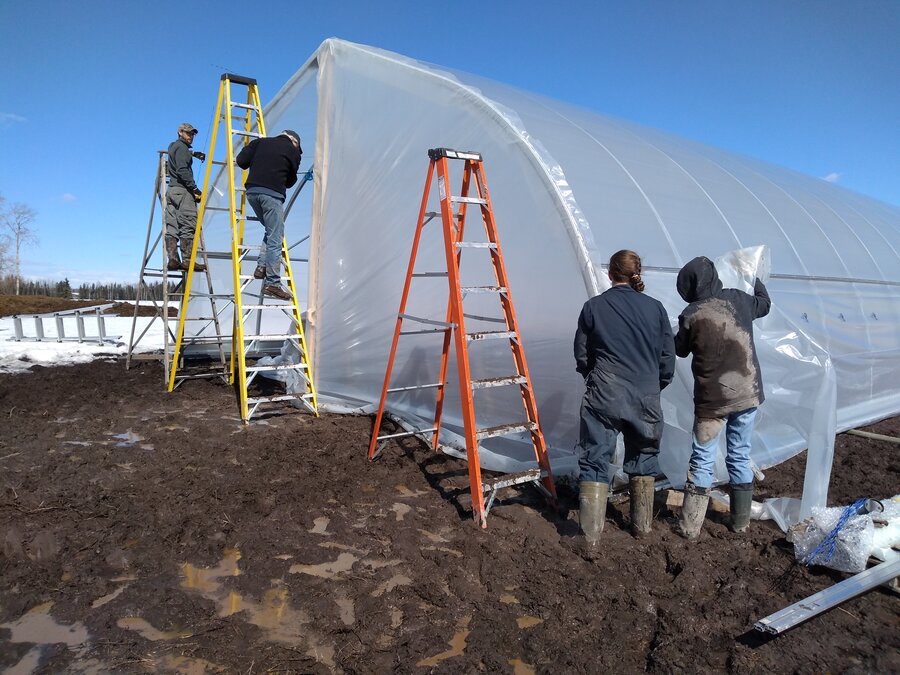
From here on in, the construction was pretty normal. I had a great crew to help put the plastic on, and we made sure to do that on a day with zero wind. For the endwalls, I opted for this super-cheap-and-dirty skissor-doors option… which seemed like the easiest way to make it so that the endwalls could be totally out of the way when it was time to drag the tunnels. I used an earth screw (28”) and aircraft cable with a turnbuckle to go from the apex of each end of each house to the ground. A note about the endwalls: this design is SUPER hard (actually impossible) to open or close if it is at all windy, or even breezy. I ended up using the skissor-doors only on move-the-tunnels days, and to get the rototiller in and out when necessary. All other tunnel access I did through the rolled-up sidewalls. Which worked just fine for me, and I have no plans to change this, I don’t mind stooping. (I am a gardener after all!) But… it’s worth thinking about this, if you’re designing your own project.
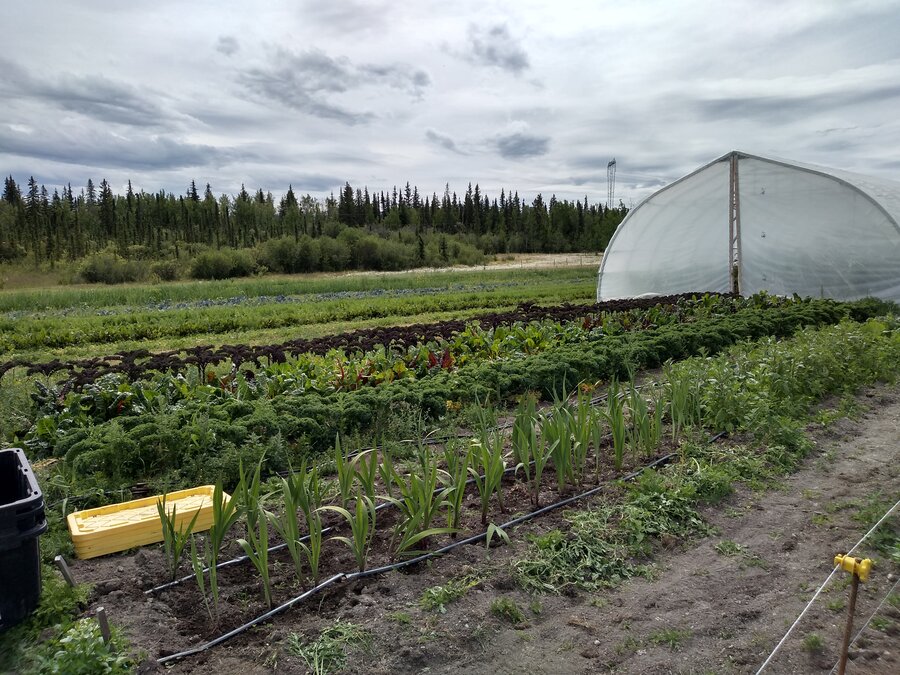
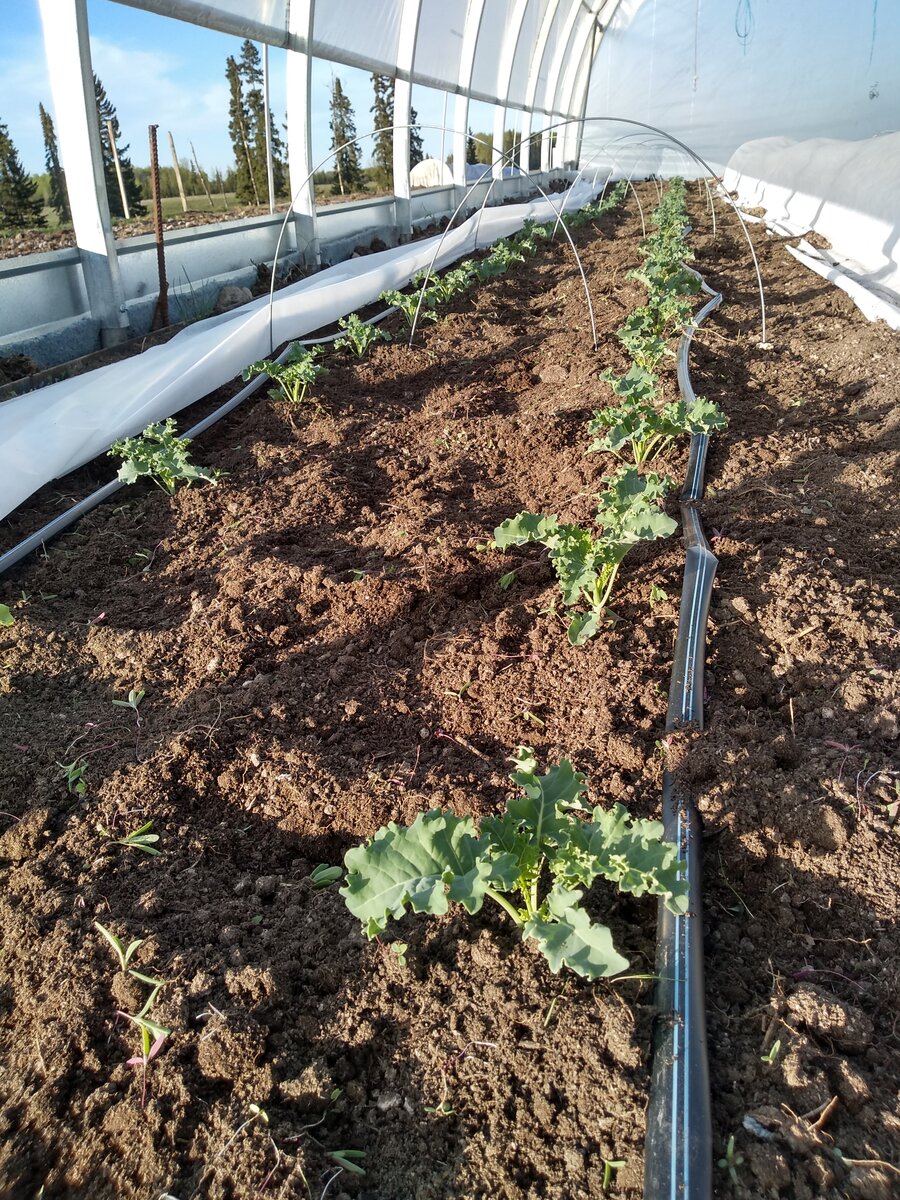
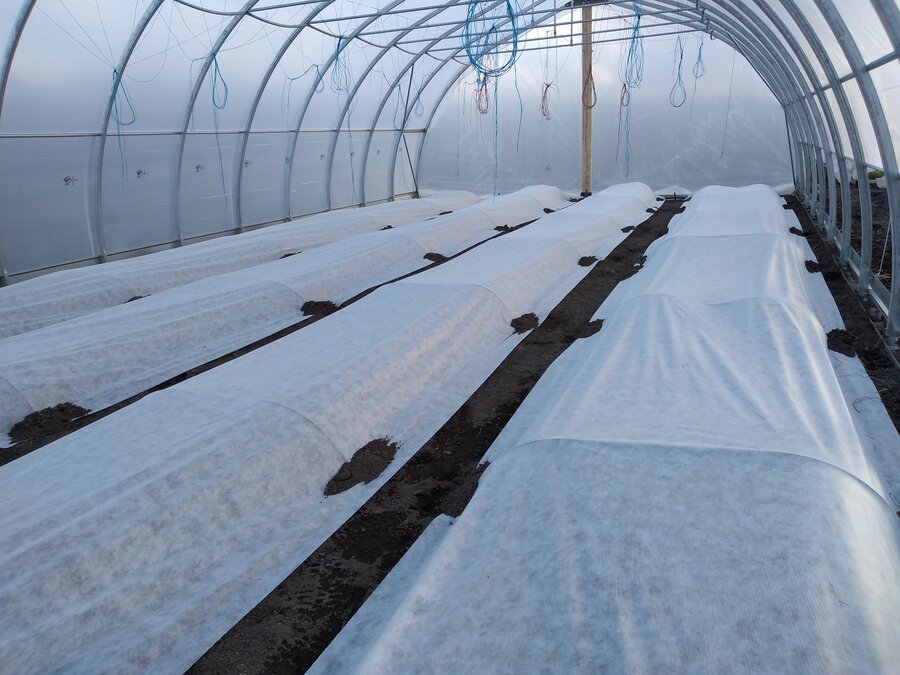
As soon as the tunnels were set up, and the ground was thawed and ready, I rototilled and planted salad greens, carrots, radishes, hakurei, arugula, spinach, and transplanted kale and swiss chard seedlings. This was mid-April, but will be mid-March in future. I row-covered everything. Which makes for boring pictures, but extra warmth and protection for the wee plants.
Moving day! Second week of May! I hope to push this back to the first week of May in the future, but I was waiting on the size and sturdiness of my tomato and cucumber seedlings. Having spread compost on the patch in front of each tunnel, tilled everything nicely with the tractor disk and harrows (SO much faster and more effective than the walkbehind rototiller – also better for soil structure… rototillers are in my opinion, The Worst! But I digress.) and then laid down the mulch and irrigation lines, it was time to get moving. Of course, on a zero wind day.
I measured out 54 feet in front of each ski, and pounded in a Tpin with a simple pulley attached. I used 2 x 56’ aircraft cables to go from each ski, through each pulley, then used chains to go from each cable to the draw-bar of the tractor. As you can see in the pictures, I used a heavy-duty strap to keep the front ends of the skis from splaying out. After unpinning all the anchors, we opened the scissor-doors out of the way, and started pulling. Very slowly. The very lowest gear. I had a friend on hand to watch and to shout at me if it looked like anything was going wonky. We discovered that placing a couple large rounds of firewood infront of each ski underneath the cable helped prevent the front of the skis from digging into the ground.

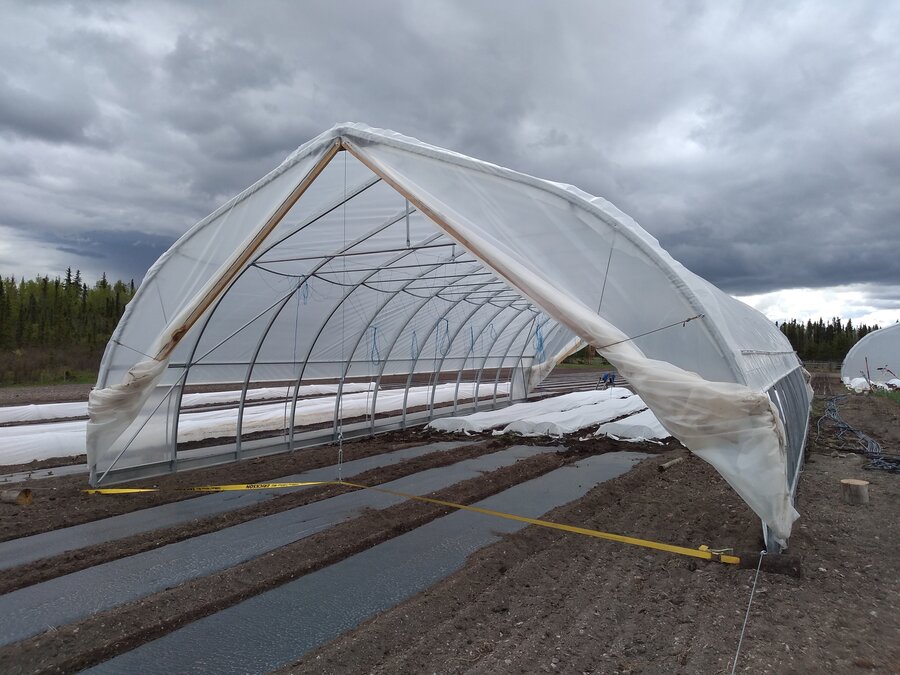
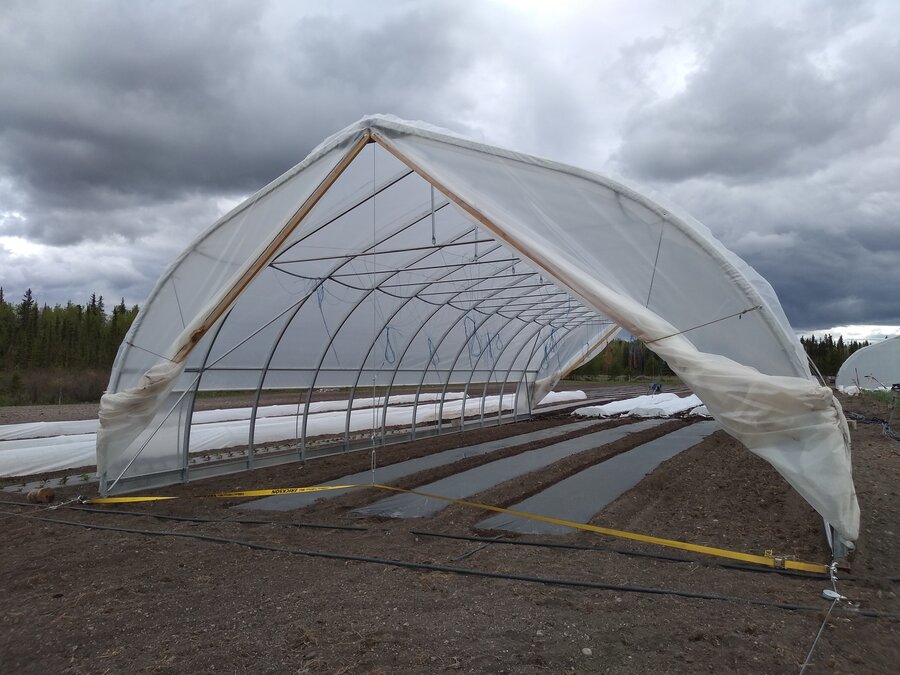
Once in place, we re-measured the spacing of the skis and used a pry bar to make sure the width of the ski spacing was correct. If the skis were too splayed out, the scissor-doors wouldn’t close. Then we re-anchored everything and patted ourselves on the back.
The next day, we transplanted the cucumbers and tomatoes.
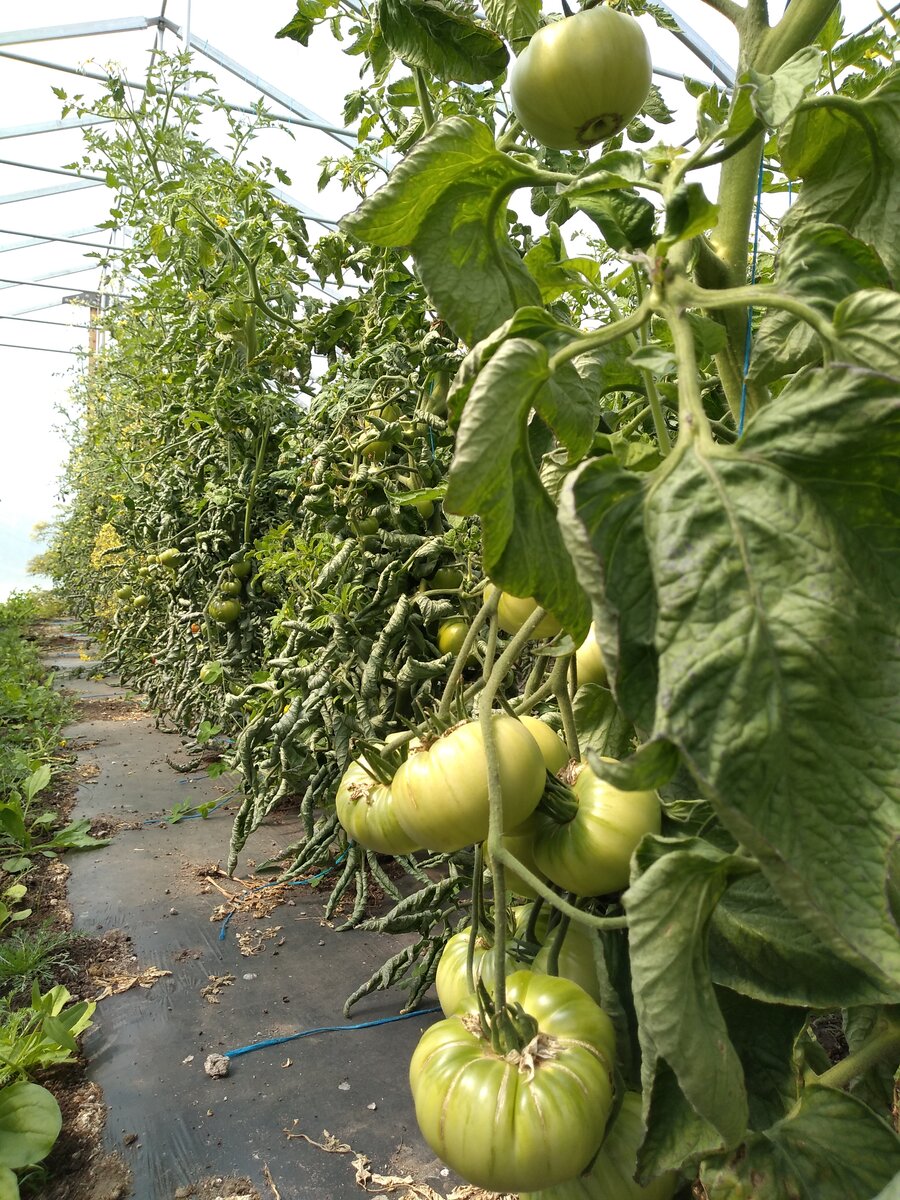
In the fall, the whole moving process happened again, this time pulling the tunnels over already seeded and established greens. Having these greens under the tunnels meant that I was able to have fresh greens available at my farmers market stall until the beginning of November.
All in all a success, spring summer and fall!
There are things I’m excited to improve about growing in these tunnels in the future (gosh, just LOOK at those weeds in the alleyways!) but the basics – the tunnel dimensions, design and the mechanics of how they move, I’m pretty pleased. I wholeheardedly encourage anyone who’s considering something like this for their garden to Go For It. It’s totally worthwhile.